Download Google Slides for Windows: Beautiful presentations in your browser
Google Slides is a cloud-based productivity tool that allows individuals and businesses to create, edit, and share personalized presentations from a unified portal. You can add colors, fonts, and other design elements to your presentation using Google Slides, including embedding videos and animations. Google Slides for Windows is cloud-based, meaning teams can collaborate on multiple projects and sort the presentations by date, with all files automatically saved on the cloud, allowing quick access across multiple devices. Once you download Google Slides for Windows, you get an office productivity tool to create and edit presentations, collaborate with team members, and seamlessly integrate with the Google Workspace suite tools, including Drive, Docs, and Gmail.
How to use Google Slides for Windows
Using Google Slides for Windows is easy, and you can follow these steps to create a Google Slides slideshow:
Step 1: Create your presentation. On the Google Slides homepage, under the section titled ‘Start a new presentation,’ you can select either a blank template or use an existing one to create a new presentation.
Step 2: Add a title. Adding a title to your presentation is very important as it keeps things organized and lets you quickly identify your presentation when you sign in to your account from a different device. Click the ‘Untitled presentation’ tag in the top left corner to rename your presentation.
Step 3: Choose a theme. Choose an aesthetically pleasing theme for a unique presentation. Click on ‘Themes’ on the menu bar at the top, and browse and select your theme from the ‘Themes’ sidebar on the right side of the page.
Step 4: Set the aspect ratio. Once you have your theme, choose how your slides fit the screen. Click on ‘File’ and then select ‘Page setup’ to choose your preferred aspect ratio.
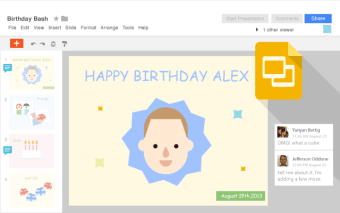
Step 5: Add text. Text makes up most of the presentation, and ensure that your texts are within the margins when adding text. The first slide is usually the title slide, and to add text to this, click on the ‘Click to add title section’ and type. The procedure is the same for the different slide types.
Step 6: Add new slides. A presentation comprises slides; to add a new slide, select ‘Slide’ from the menu bar at the top and then click ‘New slide’ from the dropdown menu. You can also duplicate a slide by selecting the slide you want duplicated and then selecting ‘Duplicate slide’ from the same dropdown menu.
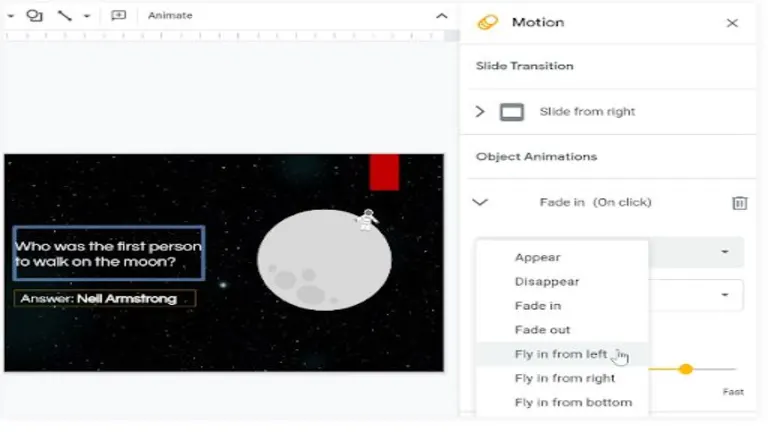
Step 7: Add media. To add media to your slide, select the slide to which you wish to add media, click on ‘Insert’ on the menu bar, and then choose the type of media you want to add, whether a chart, image, video, etc.
Once you have created your slides, you can drag the slides to fit the order you want and even delete any slides you don’t need.
Cool Google Slides features you need to know
Google Slides is a tool that allows you to create, edit, collaborate, and share presentations with others. The versatile tool hosts a myriad of cool features and tools to help you make these stunning presentations, including:
- Keyboard shortcuts: Like word processors, Google Slides offers numerous keyboard shortcuts to save time and increase productivity. For example, Ctrl + M creates a new slide while Ctrl + D duplicates a slide. To see the complete list of shortcuts, go to ‘Help’ and then ‘Keyboard shortcuts’ in the Google Slides menu.
- Custom theme: Theme choices are limited on Google Slides, and you can add new themes from third-party apps with the correct add-ons or create custom themes. To create a theme, click ‘Slide’ on the menu bar, and then ‘Edit theme’ and select ‘Colors’ in the toolbar to customize your theme.
- Explore: The Explore button in the bottom right corner provides design suggestions, helps with formatting, and allows you to search for images, text, and data from the web, Drive, and within the document.
- Compatibility: Google Slides is compatible with other presentation file formats, allowing you to import presentations from other office suites and export presentations to different file formats.
- Voice typing: Google Slides provides a voice typing feature for users who prefer dictating over typing. Just enable the feature and start speaking, and Google Slides will convert speech to text.
- Q&A: Google Slides provides a Q&A feature, allowing you to engage your audience in a Q&A session during a presentation. The audience can present questions in real-time, and you can display them on the screen and address them during your presentation for a more interactive session.
What are the benefits of Google Slides for Windows
Google Slides is a major player when considering office productivity tools for creating presentations. There are many benefits of using this tool, including:
- Cost-effective
- Real-time editing
- Collaboration
- Secure sharing
- Revision history
- Compatibility
- Professional features
- Template availability
- Online publishing
Who needs Google Slides for Windows?
Different people can benefit from downloading Google Slides for Windows, especially those looking for professional-looking presentations. These could be students, individuals, organizations, or small businesses looking for SMB productivity solutions. Google Slides is free if you have a Google account, but the paid suite offers more features and functionalities, which you can sample for free with a 14-day trial.
Google Slides is a great all-rounder but an outstanding presentation design platform for those working on collaborative projects or if you want to create professional-looking slides without the steep learning curve. Google Slides for Windows is available for the 64-bit versions of Windows 10 or later Windows operating systems, and you will need the latest version of Google Chrome to run it.